![]()
The Writers Voice
The World's
Favourite Literary Website
![]()
The Poppies Window Page 2
by
Clive Michie
![]()
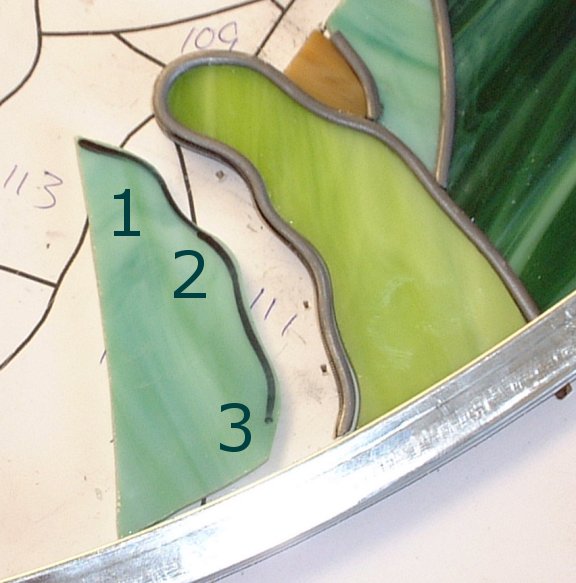 |
Here I have placed the glass in to the lead and traced on
the glass
along the lead, this allows me to see how the glass is fitting in and
where grinding may be required. Above 1 is the amount the glass
that will penetrate the lead. Between 2 and 3 is a little too much
and by removing the excess at the right of 3 and half of what is
between 2 and 3 will help the glass to slide in to place, over
grinding is easy when dealing with 1/8" lead.
![]()
 |
I will follow the vertical lines left to right to lead
every thing together.
![]()
 |
When bending lead in to a deep curve or even a shallow one
you
should over bend and roll the lead in to the curve. This is a good
way to sustain the definition of the detail of the design.
![]()
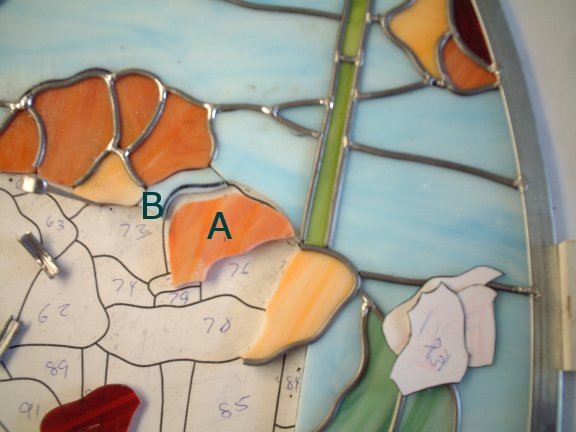 |
Above - "A" was placed over "B" and then a line placed on
"B" and
in this case I will grind all of the felt pen line off the thickness of the
line shall be the lead allowance for the heart of the lead.
![]()
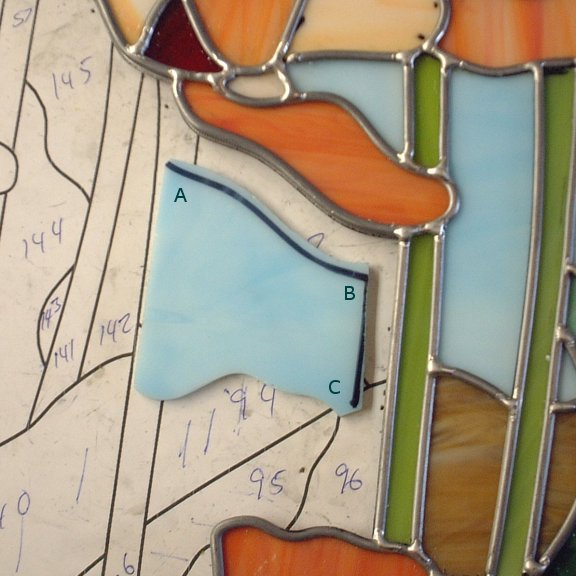 |
Above I have placed the glass in the lead and made my line
and "A"
to "B" is a bit too much, and between "B" and "C" you will see a bad
angle at "B" it is not even going in to the glass and at "C" it is way too
much. If I grind "C" to the line and leaving as much black as there
is at "B" then I will have the correct angle. But that will leave too much
at "B" and it will have to be tapered starting above B reducing the taper
to "A", Than do another fit and line.
![]()
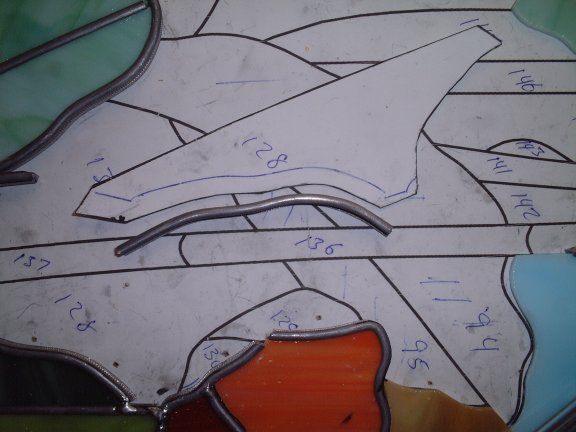 |
If the glass is growing on the bench it is wise to adjust
the paper
pattern before you cut and do a lot of grinding. I placed the paper
under the lead (good reason to tack right) and traced with a
mechanical pencil then will cut off almost to the line allowing 1/32"
allowance for the lead.
![]()
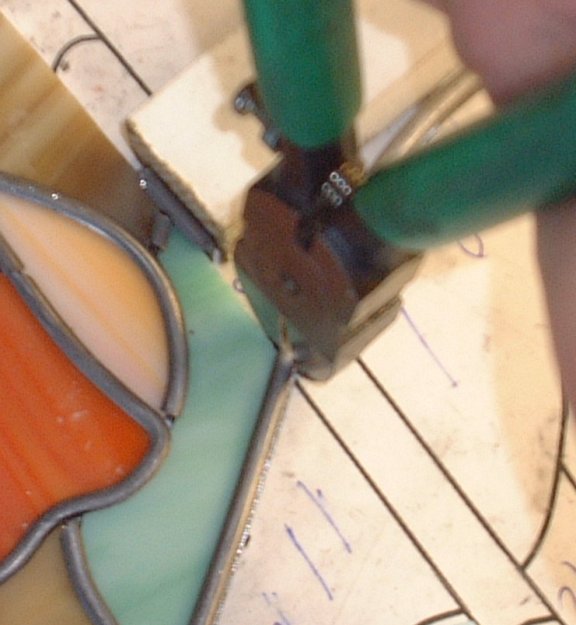 |
When cutting the lead with side cutters for lead I angle
the flat edge in
the direction that the next lead will run and cut it and then remove the
allowance for the lead to fit over the glass.
![]()
 |
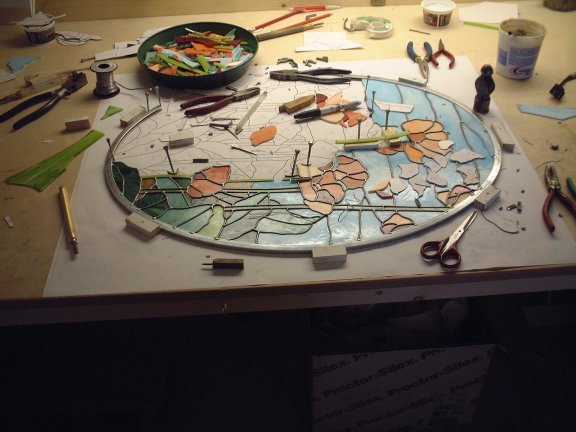
I placed the large leaf in to provide a solid grounding to work against.
![]()
 |
The dark green A is below a piece that is hovering over the
pattern
after the line was removed with pattern shears or 3 blade scissors.
![]()
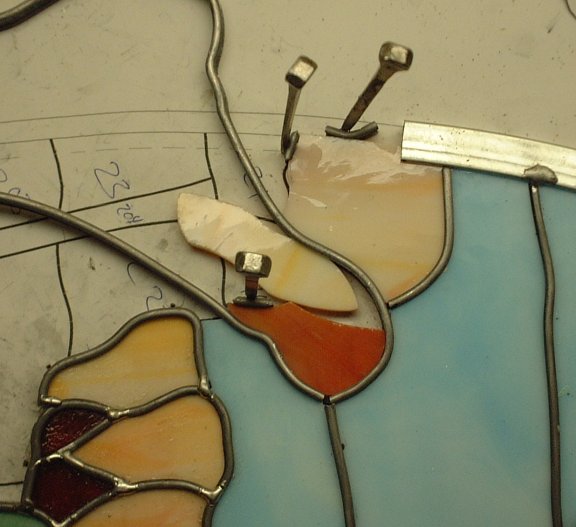 |
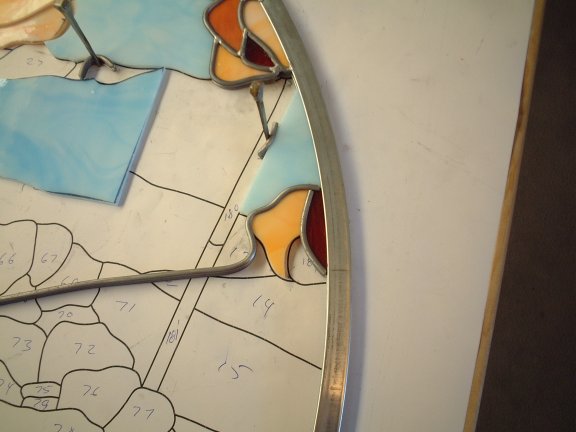
Here I am locked out and and will need to assemble the
loose piece
and the dark orange out side of the window and slide into placing and
sliding in the lead in the middle after the pieces are in place. The length
of lead around the dark orange will travel to the border. The other
will be cut off at the bottom of the light orange loose piece.
![]()
![]()
Return to The Stained Glass Town Square.
![]()
Critique this work
![]()
Click on the book to leave a comment about this work
![]()